starting notes
To avoid water spots and streaking, you want to make sure that the surface of the vehicle is cool to the touch, and preferably in the shade. Always pre-rinse the vehicle starting from the top working down to the wheels to remove loose debris. And should you ever drop any of your car wash media on the ground- use a spare one to finish the job. Never reuse the dropped media until it's washed.
Have a completely separate media for wheels/exhaust tips and rest of the car. While washing your towels and wash mitt, wash the sponge and towels for wheels separately than the towels/mitt for the body.

Swirls. Improperly cared paintwork.

Clear paintwork with minimal imperfections.
enemy #1: swirl marks
Swirls on the surface of the car are thousands of micro-scratches that give the paint a dull and negative appearance. They are more noticeable on darker colored vehicles, and can easily be seen in direct sunlight or under a focused source of light.
While there are many causes of swirls, the biggest culprit is improper washing and drying techniques. They can be avoided for the most part once you learn how to properly wash and dry a vehicle, as well as which materials to use. One trip to the automatic car wash, or a quick wipe down with the wrong kind of towel can quickly ruin the paintwork with tons of scratches. Even if the local car wash or dealership offers a hand-wash, it doesn’t mean that they are using proper methods or materials, and in many cases can do more harm than good.

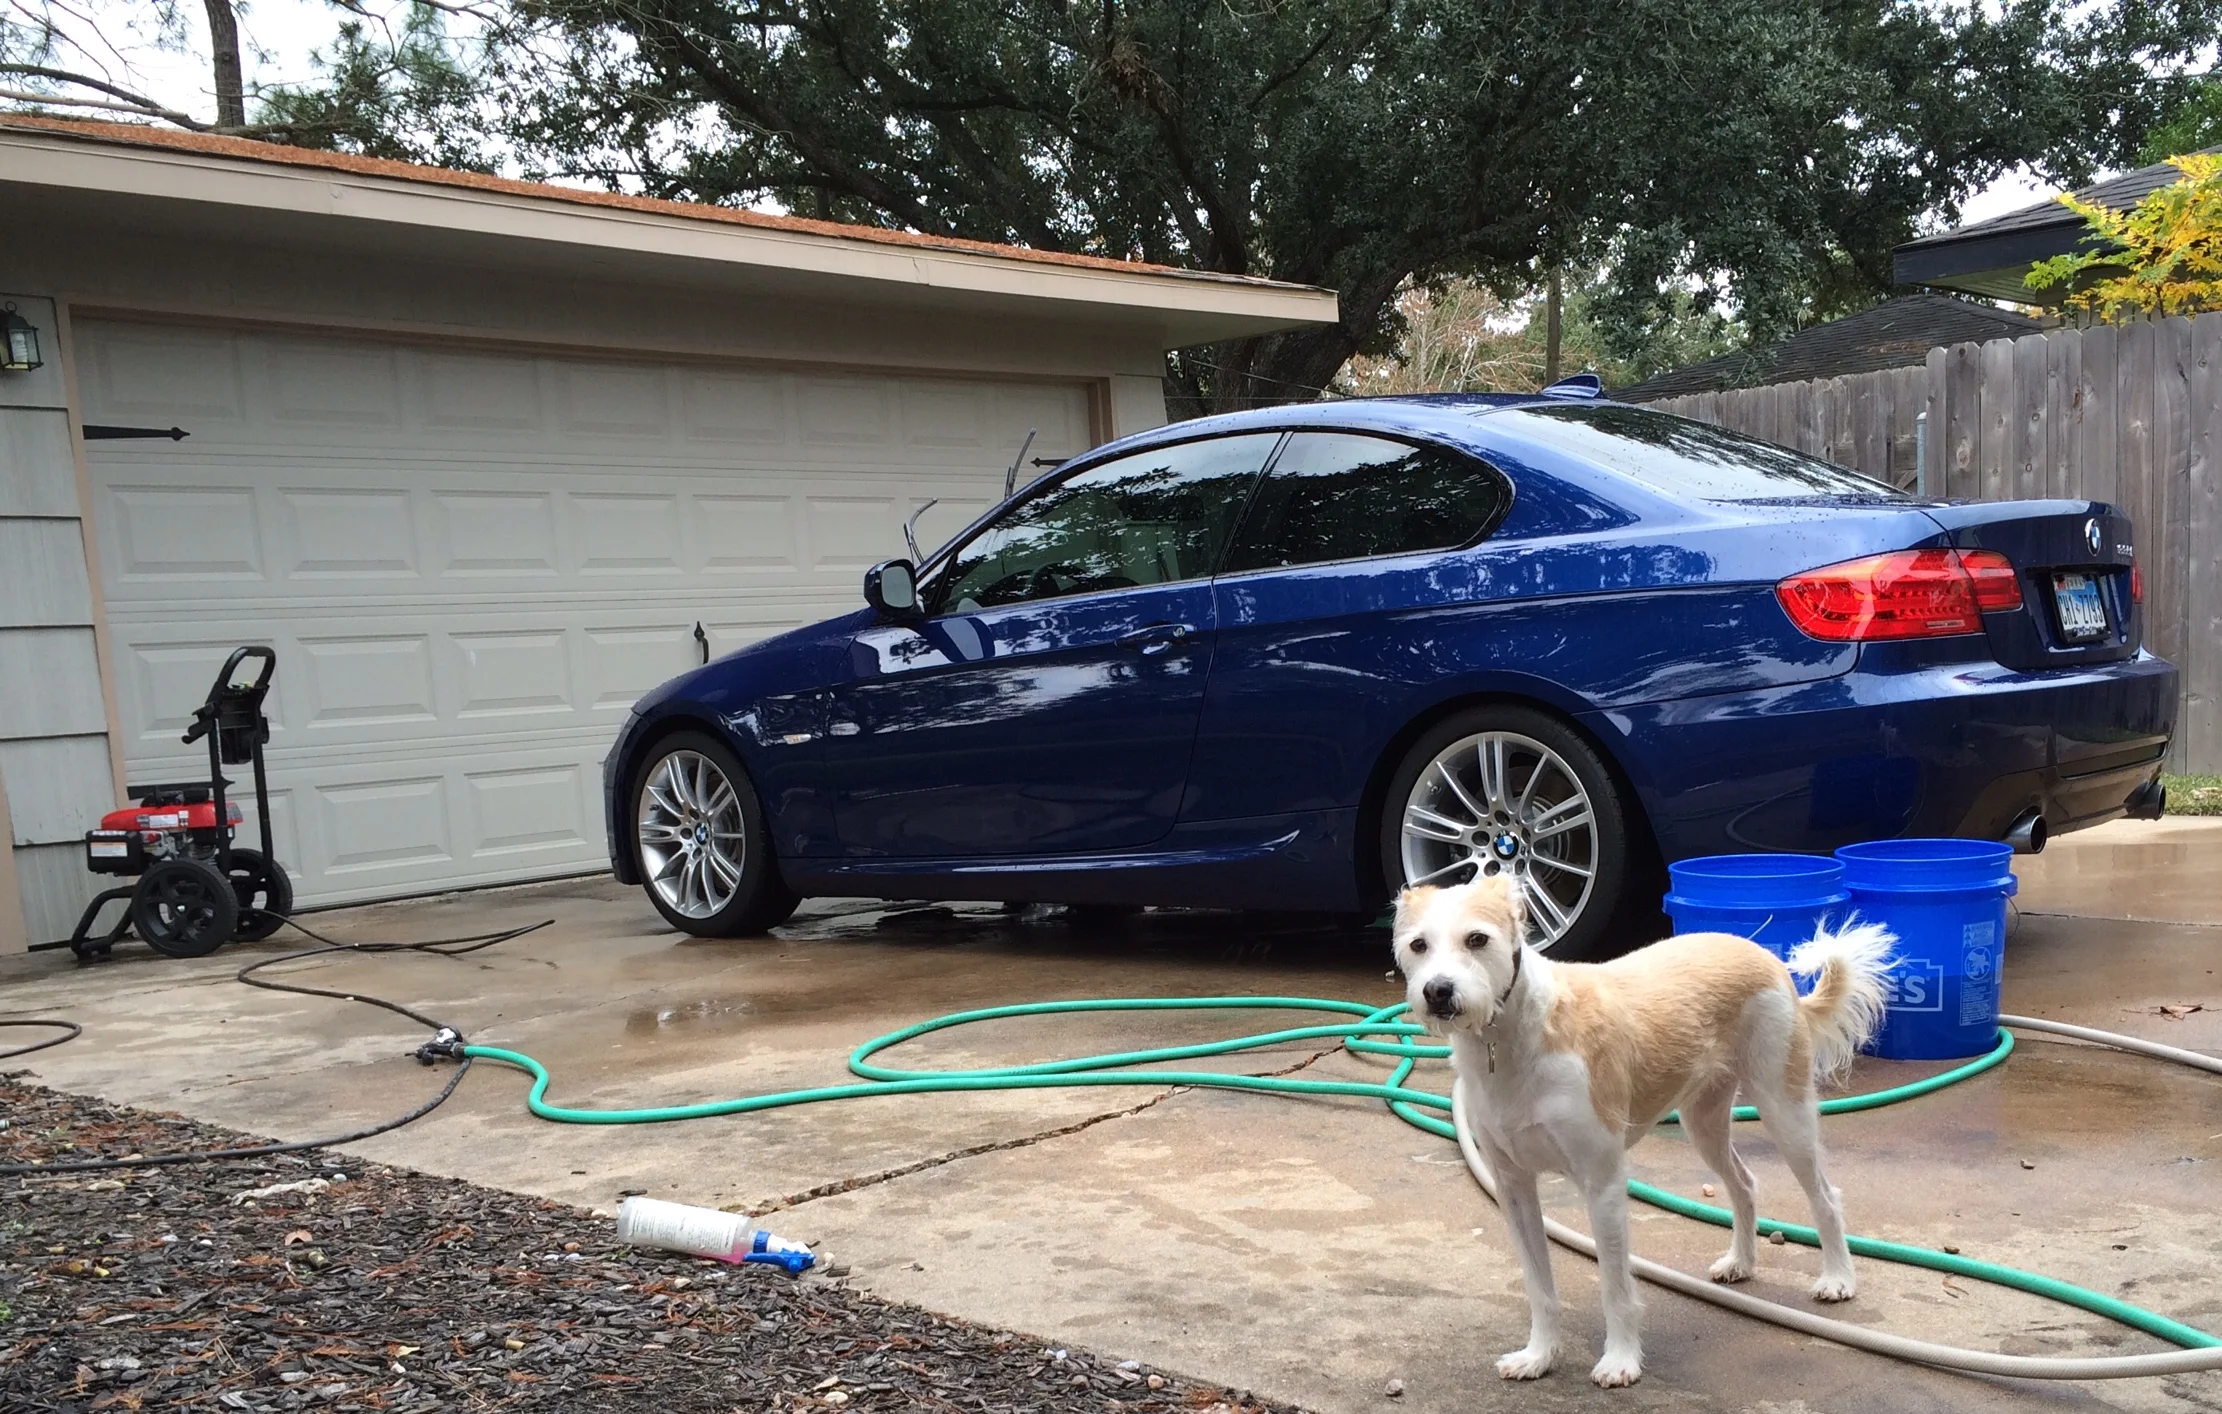
Get the buckets ready!
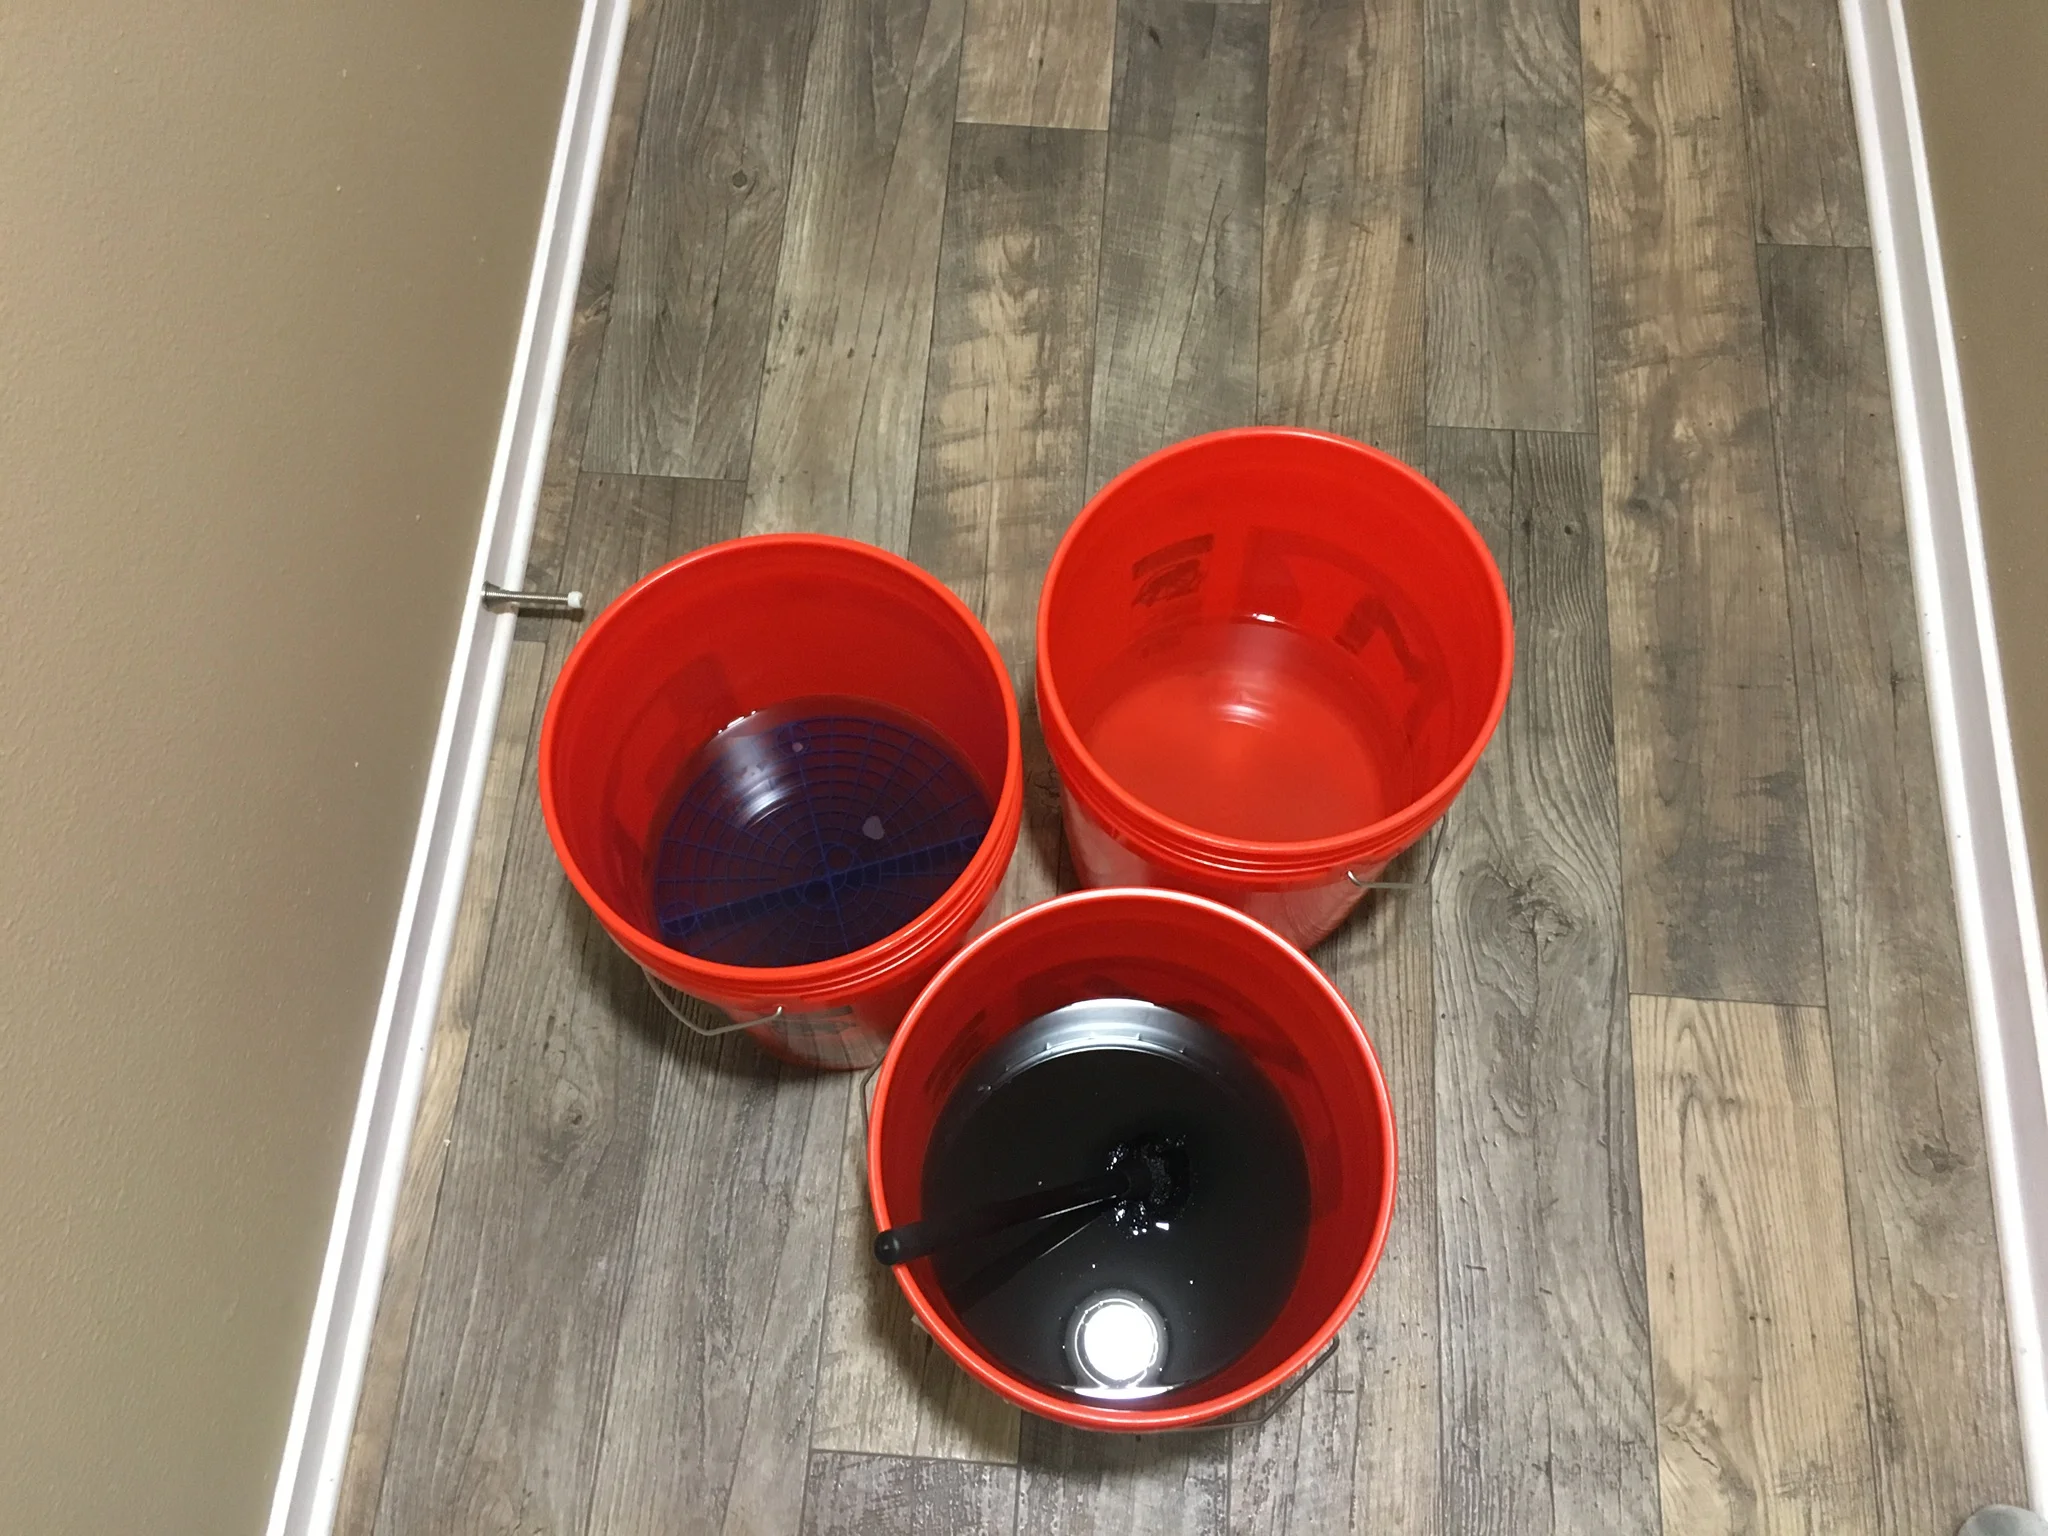
The buckets after a wash. Clear water bucket is the main wash bucket, the dirty water bucket is the rinse bucket, and the pitch black water is the wheel bucket.
prepare the buckets
Make sure you have all the supplies. We will start off by preparing our wash buckets. We will use three. One is the main wash bucket, one is the rinse bucket, and one is dedicated for wheel cleaning. Make sure the grit guard is in the rinse bucket. This helps dislodge dirt and debris from the wash mitt, and then keeps the abrasive sediment at the bottom where it is away from the cleaner water at the top. The reason you need a rinse bucket is because you want the water in your wash bucket to remain clean throughout the entire process. If you use just one bucket that means you’re introducing dirt into your wash water, then using that same dirt to wash your car resulting in swirls!


wheels first
Always start the car washing process with the wheels first. The reason we do this is because the wheels are typically the dirtiest parts of the car, and we don’t want to risk overspray from the wheels getting all over a clean painted surface.
The brake dust on wheels are small metal filings and flakes. Therefore, ensure that you have a dedicated bucket and wash media strictly for wheels. Never use your wheel washing materials on painted surfaces. There are too many abrasive contaminants on the wheels, and if you were to use it on the paint afterwards, you’ll most likely damage the finish.
Pre rinse all 4 wheels to remove loose dirt and debris. Then spray the wheel cleaner gel throughout each wheel making sure to spray in the wheel barrel. Wait for the wheel cleaner to turn purple, then use your wheel brush soaked in the wheel wash bucket to clean each wheel. Use a sponge or soft cloth to wash the face of the wheel.
Top DOWN Method
When washing the vehicle, we will start at the top and work our way down. We will wash the roof, windshields, hood, trunk lid, and then move down to the sides- in that order.
Dip the sheepskin mitt into the main wash bucket, and then clean one small section at a time using little to no pressure. We are merely trying to float away dirt and debris from the surface. When washing the horizontal surfaces on top, use a straight arm motion from front to back (as the air flows when the car is moving). I’ll typically work one panel at a time, and then thoroughly clean out my wash mitt in the rinse bucket before moving on. The roof and hoods will require cleaning the mitt once in between.
After washing each small section, dip the dirty mitt into the rinse bucket and agitate against the Grit Guard at the bottom of the bucket. This will help to dislodge the dirt and debris from the mitt and keep it at the bottom of the bucket. After rinsing, then dip it back into the main wash bucket to start the process over again.
When you finish washing the vehicle, your wash bucket should be as clean as when you started. Never introduce dirt into your wash bucket!
Now that we've finished the horizontal surfaces, move on to the vertical surfaces and work your way around the car. Here you want to wash in straight up and down motions and in small sections the same as you did on top. Rinse your wash mitt frequently, as the lower areas get very dirty.
Wash vertical surfaces in up and down motion. Remember- you don't want to use too much pressure on the paint- let the shampoo and wash mitt do the work.
As we make our way around to the back of the vehicle, let's take a moment to wash the exhaust tips using small wheel brush (dedicated for exhaust tip cleaning).
After we are done using the wash mitt on every panel of the car, it's time to rinse off the shampoo and start the drying process. Take the nozzle off of the hose and allow it to flow freely over the surface. This sheeting action will prevent water droplets (that cause spots), and will reduce the amount of actual drying required.
dry and shine
We’re done with the wash process now, so let’s move on to the proper way to dry it to keep from marring the finish.
Just because you’re armed with some microfiber towels it doesn’t mean that you’re not going to induce swirls in your paint. You also need to have the right kind of microfiber and use light pressure. For drying, we will use a waffle weave microfiber towel and for buffing we will use a plush microfiber towel.
First lets take the waffle weave microfiber and blot each panel- working from top to bottom. Minimize dragging the towel on the paint as much as possible. Waffle weave towels are able to hold a lot of water, so blotting works well with this kind of towel.
After drying with the waffle weave towel, we'll buff the paint to remove any remnants of water. For this step, we will add some lubrication using a quick detailer. Use a fine mist either on the surface or directly onto the towel, and lightly buff to a brilliant finish. If you spray directly onto the surface, and end up with streaking or smearing, then try misting a little bit directly on the towel instead. By using this method, we are also drying and waxing all in one quick step! This method is quick, easy, and it is very safe for the finish of the car.
Use a dedicated wheel towel to wipe down the face of the wheels and then apply tire dressing to the tires.
All done
If you follow these key steps in washing and drying, you should be able to keep your vehicle looking its absolute best without inducing swirls in the washing and drying process. Once you get this system down, you should be able to complete the entire process in an hour or less.